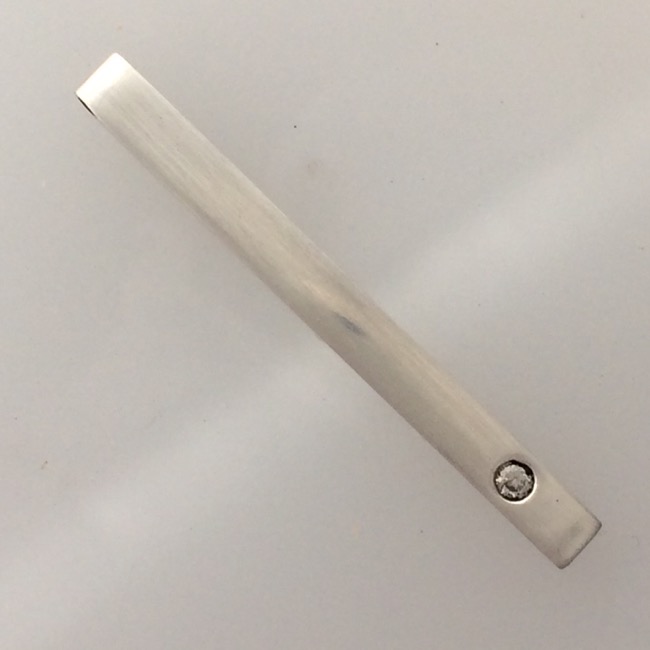
Gypsy setting or flush setting is something I have been promising my students for ages and have only now got around to. I began by doing some research on my iPad and found this excellent tutorial on the Ganoskin site. https://www.ganoksin.com/article/basic-gypsy-flush-mount-setting/
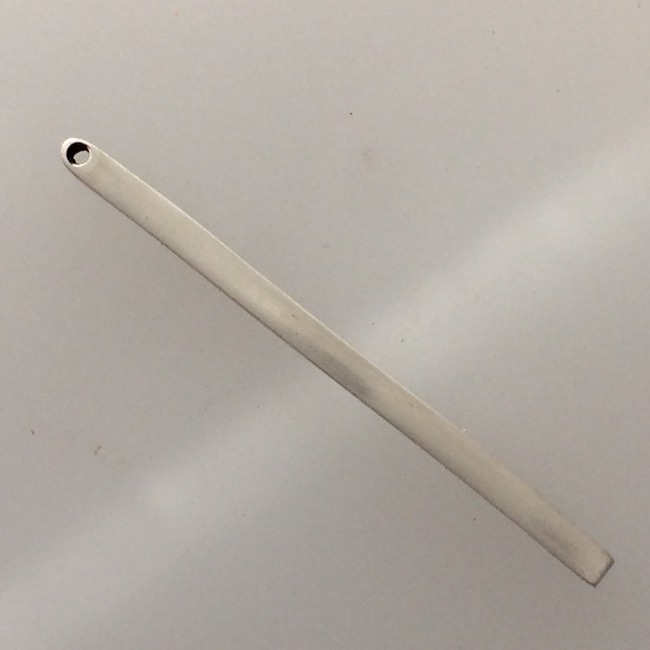
Originally I decided to try it on a silver cuff bangle and found some suitable silver which was 3.3 mm wide and 2 mm deep in my old stock box. Using a jig to ensure a square cut, I carefully sawed off 145 mm to shape into a cuff and set that aside. I was left with a piece which was 35 mm long which I thought was perfect for a pendant or as an example for a pair of earrings. As a pendant I began by considering how it would be worn. Obviously I could drill a hole or solder on a jump ring but something so sleek deserved a more elegant solution. I decided to set a small piece of tubing into the top edge that a thin chain could thread through. Great practice for making hinges too! I used a slitting needle file which has a parallel, diamond shaped profile to file a groove which I could widen to accept a 2mm outside diameter piece of silver tube. I could have used a triangular or a square file instead. When using these though you need to be careful to keep things an even depth. The tapered shape makes this a little harder so you need to do a little from each end and keep checking. After making the groove quite deep I used a diamond cylinder burr the same diameter as my tubing, in my pendant motor, to very slowly drill a groove to accept the tubing. This needs to be about half the diameter of the tubing so the edge of the silver pendant comes to a knife edge front and back. My first attempt wasn’t deep enough and after soldering, I wasn’t able to make the tube ‘vanish’ after sanding. When I was sure the tube was a perfect fit, and even from all sides I was ready to solder.
I stood the silver up almost vertical and used liquid flux under the tube which I then dried very carefully so it didn’t dislodge. Then I added tiny chips of hard solder and soldered it into place. For my first attempt I used solder paste but it is very hard to judge the right amount. Traditional solder worked much better. After pickling and rinsing I was ready for the next stage.
Before doing the setting I wanted to finish the silver from all sides. Rubber wheels worked well to on the front to make the tubing effectively disappear from view and I used normal finishing and polishing method until I had a lovely, shiny well finished piece ready for setting.
Key to the success of this project would be ensuring the stone was central and everything very well finished. I used a vernier to measure the width of the metal, mindful that this would have changed from when I started. I then set a vernier to the size of the central point and used this to help me set my dividers to measure the centre point. I find seeing half millimetres on a ruler a challenge even with glasses! This was much easier and by making a mark from either edge I knew the exact middle was inbetween those two points. I read recently it was better to use a small ball burr to make the initial divot to start drilling. I actually used ball burrs all the way through instead of my usual practice of using a drill because I found it much easier to correct any slight deviations from the centre. I worked up from the tiny one to a one mm and finished with a 1.5 mm which went all the way through. I then used a 2mm ball burr to make the seat for the two mm cz. Take care with this part. It doesn’t need to very deep and it is very quick, even at slow speeds! Next time I may do by hand.
Setting was done using a nice chunky burnished working methodically according to the instructions in the article. Final finishing and polishing and my pendant was complete. It is very different to my usual style but I learnt a lot and it was very satisfying to successfully complete a new technique. I am not sure how or when I will finish my cuff . Another project for another time. Have a go with the Gysy setting and let me know how you get on.