Category: Handmade Enamel Jewellery

  • New Ammonite ‘Fossil’ Pendants

    New Ammonite ‘Fossil’ Pendants

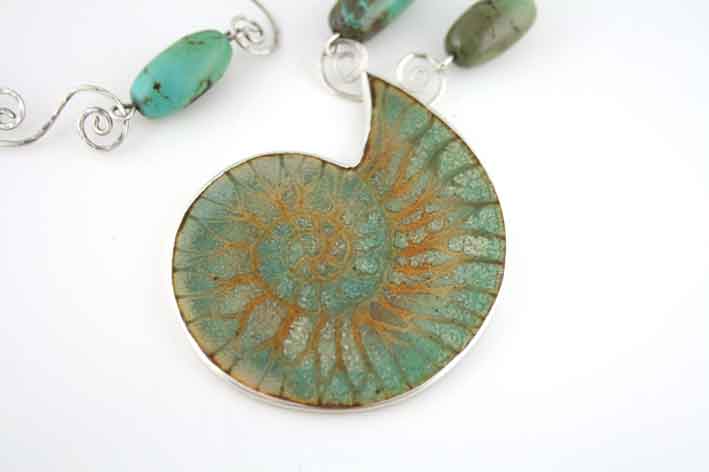
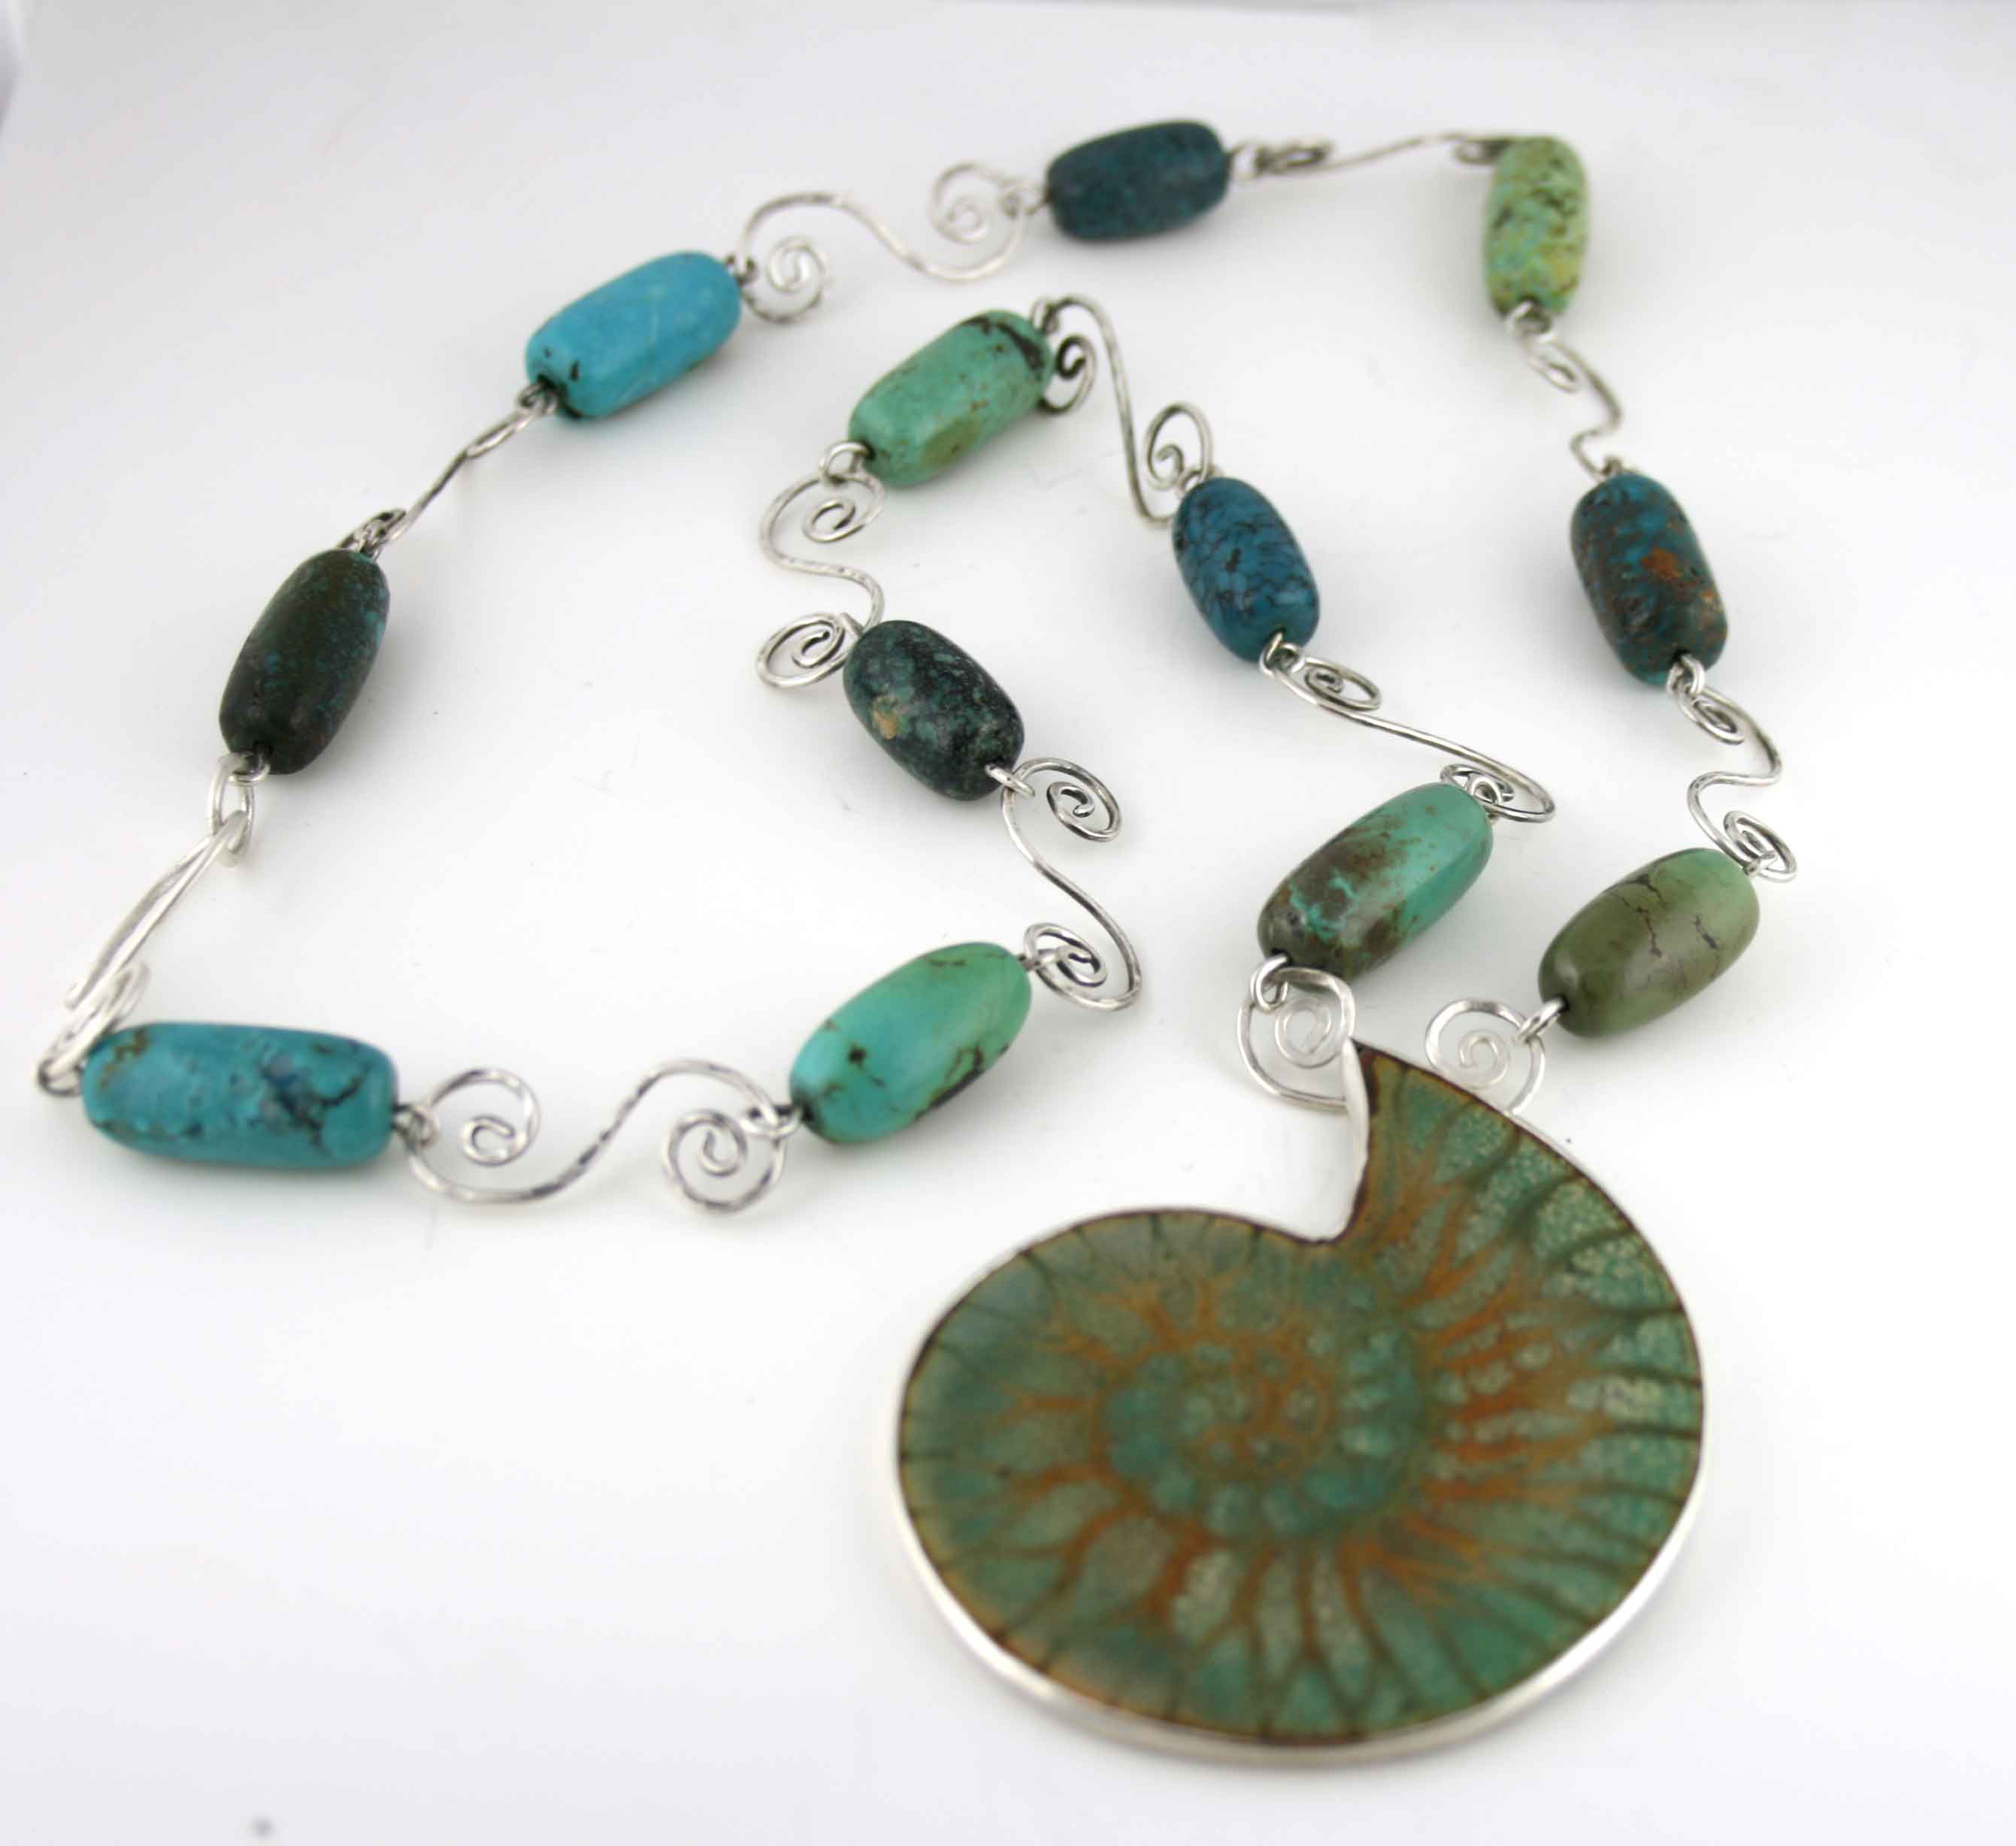
    I have been working on some new ‘statement’ Ammonite ‘Fossil’ necklaces that I would like to share with you. The enamels have been created using Sgraffitto techniques. They are all on copper and I have set them in silver, sometimes with the addition of 18ct gold prongs.  Hope you like them.

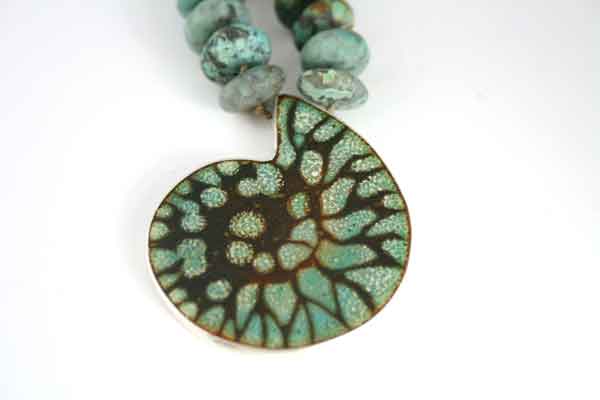
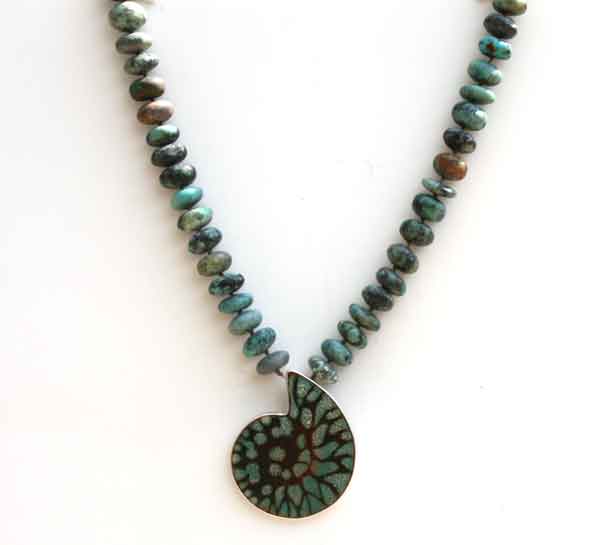
    Small Turquoise Enamel ‘Fossil’ set in Silver bezel

    • Hand-made silver clasp
    • Matt Turquoise Beads on hand knotted silk
    • Enamel is approximately 45mm x 40mm
    • Length of necklace is approximately 48 cm
    Turquoise Enamel Ammonite Fossil with Turquoise Beads
    Turquoise Enamel Ammonite Fossil with Turquoise Beads

    Turquoise-Fossil-with-Knotted-Turquoise-beads-2 Turquoise-Fossil-with-Knotted-Turquoise-beads-3


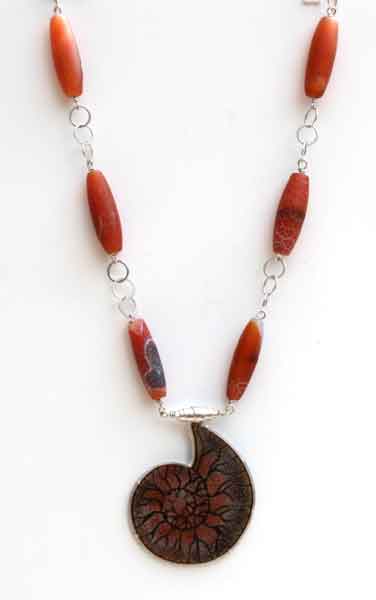
    Large Orange Enamel’ Fossil’ with 18ct gold prong setting on sterling silver

    • Hand-made silver clasp, bail and chain
    • Matt ‘Dragon Skin’ beads
    • Enamel is approximately 65mm x 55mm
    • Length of necklace is approximately 68mm
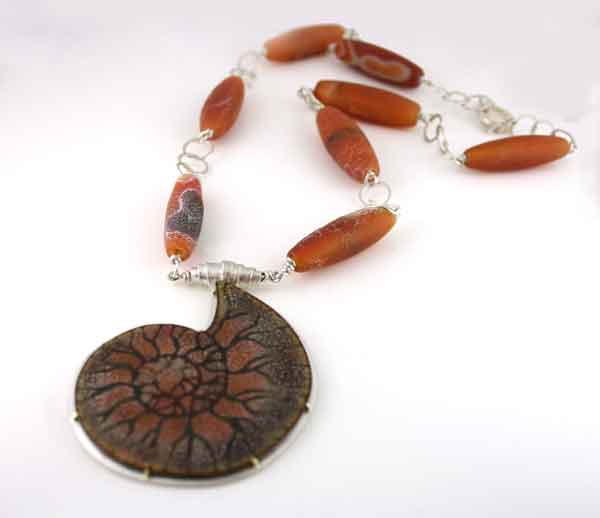
    Orange Ammonite Fossil Necklace with Dragon Skin Beads
    Orange Ammonite Fossil Necklace with Dragon Skin Beads

    Orange-Fossil-with-Dragon-Skin-Beads-and-chain-2 Orange-Fossil-with-Dragon-Skin-Beads-and-chain-3

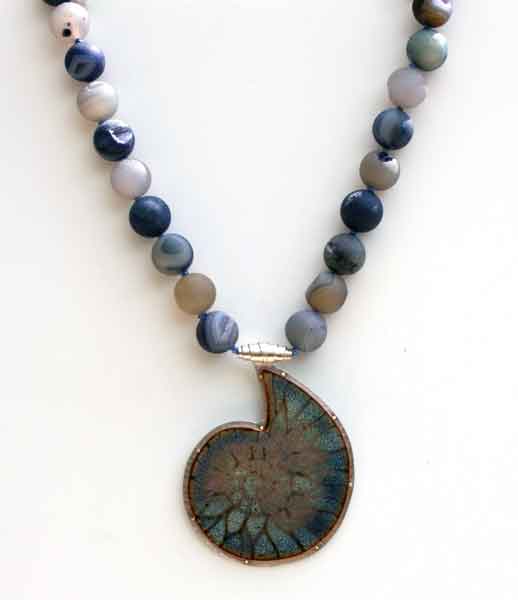
    Large Blue Enamel ‘Fossil’ with 18ct gold prong setting on sterling silver

    • Hand-made silver clasp and bail
    • Matt Agate beads on hand knotted silk
    • Enamel is approximately 65mm x 55mm
    • Length of necklace is approximately 50mm
    Blue Ammonite Fossil Necklace with Agate Beads
    Blue Ammonite Fossil Necklace with Agate Beads

    Blue-Fossil-with-Knotted-Agate-Beads-2 Blue-Fossil-with-Knotted-Agate-Beads-3

    Large Turquoise Enamel ‘Fossil’ set in silver bezel

    • Hand-made silver clasp and chain
    • Turquoise beads
    • Enamel is approximately 65mm x 55mm
    • Length of necklace is approximately 68mm
    Large Turquoise Ammonite Fossil with Turquoise Beads
    Large Turquoise Ammonite Fossil with Turquoise Beads

    Turquoise-Fossil-with-Turquoise-beads-and-Coil-Links Turquoise-Fossil-with-Turquoise-beads-and-Coil-Links-2

  • Cloisonné Enamel – The Making of my New Magic Carpet Pendant

    Cloisonné Enamel – The Making of my New Magic Carpet Pendant

    Cloisonné Enamel – The Making of my New Magic Carpet Pendant

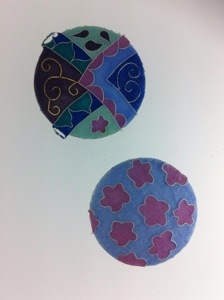
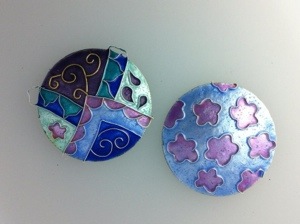
    Cloisonné enamel is where fine wires are embedded in the enamel to create the design. There are a lot of different stages involved in making a piece using this technique and I decided to use my new Nimbus Cloud Dome to take pictures of the making of my new ‘Magic Carpet’ inspired Cloisonné enamel piece.

    20140207-165052.jpg
    This shows the wires laid onto the base. In this case I am using fine silver foil on a copper base. I have used Soyer Silver flux over the foil and fired that before starting to add the wires. I have used fine silver and fine gold wires. They were fired into place in two separate firings as the design was too complicated to do all in one. I use Kyre-fire to hold the wires in place to go into the kiln.

    20140207-165743.jpg
    This shows the first layer of colour fired into place. I have used a light blue under where the pink will go. I find that this helps the pink to fire a better colour.

    20140207-165924.jpg
    This shows the second layer of colour that has been wet laid into the cells before it is fired. It is quite tricky where the design is complex to keep the colours separate. A good light and  the right glasses are essential!

    20140207-170135.jpg
    Here the second layer has been fired. I am really pleased with the pink particularly.

    20140207-170348.jpg
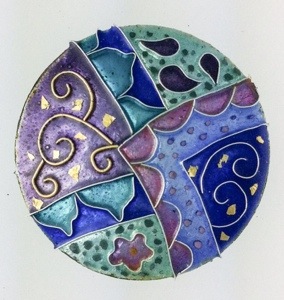
    Here I have added fine gold foils and painted oxides to the design. After firing I will then complete the enamelling with two layers of Blythes Medium flux. The two layers will be fired separately. If you apply it too thick it tends to go cloudy and obscure the colours. After the last firing I use a fine diagrit to rub all over the enamel to remove any excess. The aim is to achieve a level surface with no high spots or depressions. The latter show up as a shiny patch amid an otherwise matte surface. If necessary, I add more medium flux and refine and then repeat this stage. When all is flat and perfect I use a succession of wet and dry paper with lots of water to achieve a soft eggshell finish. I use Renaissance Wax to seal the surface and to protect it.

    20140207-170619.jpg
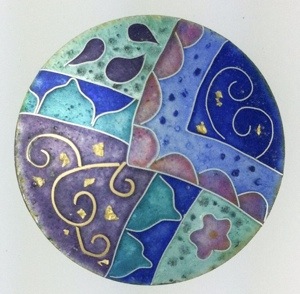
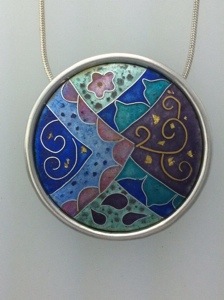
    This is the finished piece before setting. There are hours of work involved to get to this stage.

    20140207-171142.jpg

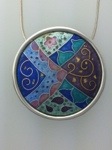
    The completed Cloisonné Enamel ‘Magic Carpet’ inspired enamel set in a sterling silver surround.

  • Thursday Tip – Carefree Lustre Part 1

    Thursday Tip

    Welcome to the latest in a series of articles to do with enamelling and making jewellery. I hope you find them useful. I am writing about issues and problems I have experienced (and hopefully overcome), and tips and shortcuts concerning enamelling and making jewellery that I have come across in the course of the past twenty years or so. In this post I am going to tell you one of the ways I use Carefree Lustre in my enamelling.

    Carefree Lustre

    I like to add touches of gold to a lot of my enamels, just to add a little ‘twinkle’. I used to use precious metal essence. This is  very expensive and also very tricky to use. Recently I have been using Carefree Lustres and have been very pleased with the results. I buy mine from Enamelsupply.com. For those members of Guild of Enamellers who are coming to conference in April, Tom Lumsden will be attending and will bring small orders with him so saving on postage!

    Using Gold Carefree Lustre – Part 1

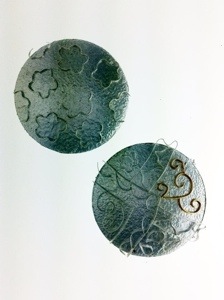
    Enamel on copper badge with gold Carefree Lustre detail
    Enamel on copper badge with gold Carefree Lustre detail


    I often like to add painted line detail using this. I take a little in a tiny pallet and using an eye dropper I add a drop of Klyre Fire and mix it. Using a fine brush I paint it on quite thickly. The surface needs to be free from grease and if it is ‘balling up’, I clean the surface with a cotton bud dipped in methylated spirit. The Carefree Lustre dries very quickly. When dry you can neaten lines by scratching back with a cocktail stick and blowing away the dust. I fire in a very hot kiln, around 950 – 1000 for 30 seconds. I then check it. There will probably be some dust still on the surface that will rub off but underneath should be fired. If necessary I return it to the kiln for another 20 seconds. It is very easy to over-fire and for it to burn out. Applying it in a thick layer gives you a little leeway. I keep the pallet in a resealable plastic bag and reconstitute it as required with a little more Carefree lustre and Kyre fire. If it is very hot where I am working, sometimes I might add a drop or two of water.

    Note: After I wrote this I acquired a Digital kiln. I have just tried firing for 1 minute at 900 and this worked well. I may try shortening the period to say 50 seconds another time.

    This is one way I use Carefree Lustre. I hope you find it useful and will have a go adding  Carefree Lustre detail to your enamels.

  • Reuseable Stencils for Enamelling

    Reuseable Stencils for Enamelling

    Thursday Tip

    Welcome to the latest in a series of articles to do with enamelling and making jewellery. I hope you find them useful. I am writing about issues and problems I have experienced (and hopefully overcome), and tips and shortcuts concerning enamelling and making jewellery that I have come across in the course of the past twenty years or so. In this post I am going to tell you about how I make reusable stencils for use in my enamelling.

    Reusable Stencils for Enamelling

    There are many different materials you can make stencils from. My favourite is to use Transparent Film similar to that used for OHP slides. They are perfect as they are not too thick and are perfectly flat. Sometimes though I use the transparent windows you get on packaging. The main advantage of this material is that it is reusable an infinite number of times and is of course waterproof.

    Making Reusable Stencils

    I trace my design onto tracing paper with a fine pen. I then stick this tracing onto my transparent film. Then I cut out the shapes with either fine decoupage scissors of a scalpel and a cutting mat. You finish up with both positive and negative shapes that you can use at different stages. I make little tabs of sellotape to make them easier to pick up cleanly. If there are a lot of very similar pieces like the windows on my Brighton Pavilion Clock, I number them.

    [singlepic id=8 w=320 h=240 mode=watermark float=center]

    Using Reuseable Stencils

    I spray the surface with a very fine spray of water. Not too much as you don’t want to flood it. Then I place my stencils carefully into position. The thin film of water hold them in place. Then I sift my chosen colours into place. With very fine point tweezers, carefully lift your stencils. With the larger ones it often helps to hold the piece at an angle so any stray enamel doesn’t fall in the wrong place. Dry carefully and fire. I put the tiny stencils into glass pots to dry so all the enamel falls off. they can then be reused. I hope you find this Tip useful to enable you to make reusable stencils for enamelling. Let me know how you get on.

  • Wolf Tools Belt Sander

    Wolf Tools Belt Sander

    Welcome to the latest in a series of articles to do with enamelling and making jewellery. I hope you find them useful. I am writing about issues and problems I have experienced (and hopefully overcome), and tips and shortcuts concerning enamelling and making jewellery that I have come across in the course of the past twenty years or so.

    Wolf Tools Belt Sander

    [singlepic id=35 w=320 h=240 mode=watermark float=center]

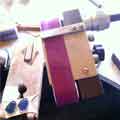
    This was delivered by Father Christmas and is proving to be a wonderful addition to my tools. it connects to my Foredom Pendant Motor. It comes with a selection of belts and I am currently using it to sand the bottoms of silver bezels I am making prior to soldering them to a base plate. It is much quicker than sanding them be hand, and they seem to stay in shape much better. It will also be invaluable when I want to solder press-formed shapes together. I always found sanding their bottoms very tedious and I think this will really speed things up. Sutton Tools are the stockist for the UK. What is really interesting is that you can purchase Diamond Belts which I think will be ideal for finishing enamels on a small scale. With the foot control you have a lot of control over speed and of course the necessary water would be well away from the motor. Unfortunately they are not available in the UK, but RioGrande in the States do stock them and a friend who is on holiday there is going to bring some back for me. Can’t wait to have a go. If you have any experience of using this tool, I would love to hear from you.

  • Using Liquid Enamel

    Using Liquid Enamel

    Welcome to the latest in a series of articles to do with enamelling and making jewellery. I hope you find them useful. I am writing about issues and problems I have experienced (and hopefully overcome), and tips and shortcuts concerning enamelling and making jewellery that I have come across in the course of the past twenty years or so.

    An Easy Way to Prepare Liquid Enamel for Use

    I use Liquid Enamel from WG Ball. It comes in tubs in a good variety of colours, ready mixed in water. It is of course unleaded as are all liquid enamels. Although it is very convenient being ready mixed, it still always needs a good stir as all the enamel sinks to the bottom very quickly. It needs to be well mixed before every use, even if in the same session. If it is very solid, I start off with a stainless steel stirrer. Then I use a battery operated whisk that they sell in cook shops for whisking milk for milk shakes. It works brilliantly and is much quicker to do a thorough job. After use I just plunge it in a tub of clean water and whisk again to remove all the enamel and leave it clean for the next use. I find this saves me lots of time. I hope you find it useful too.

  • Filling Holes in a Ready Made Copper Blank

    Filling Holes in a Ready Made Copper Blank

    Welcome to the latest in a series of articles to do with enamelling and making jewellery that I intend to publish. I hope you find them useful. Although I planned to write them weekly, unfortunately I missed a few last year due to sheer pressure of work. Many apologies and My New Year’s resolution is to do much better! I will be writing about issues and problems I have experienced (and hopefully overcome), and tips and shortcuts concerning enamelling and making jewellery that I have come across in the course of the past twenty years or so.

    What to Do When Your Ready Made Copper Blank is Pierced and You Want to Make a Brooch

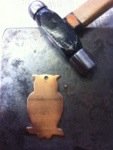
    I came across this problem this Christmas when I decided to make a range of enamelled owl brooches. I wanted to make them as a stocking filler item and so needed to use a ready made shape. The only one I could find that was suitable came only as a pierced shape. I ordered them anyhow as I knew I could fill the hole with a wire rivet that wouldn’t show after enamelling.

    Making the Rivet to Fill the Hole

    I chose copper wire that was a tight fit in the hole. In this case I used 1.2 mm. I used a saw to cut a short piece approximately 2mm longer than the thickness of the blank. Use a saw instead of wire cutters to end up with a nice, flat cut that you need. Alternatively you could use wire cutters but then you would need to use a file.

    Try your wire for fit, set your blank onto a steel block. Then I use a small, light hammer with a flat face. Tap gently on the wire to spread it a little, turn over and repeat on the other side. Work methodically and you should end up with a neat rivet that is almost invisible. Try not to put hammer marks in the blank itself, although a few light ones probably won’t show. You can continue with emery paper if you wish, although I didn’t find it necessary because I was making was using a riso screen over my surface that completely hid any evidence of the rivet. Have a go. It is useful to be able to do this if you need to. Tomorrow I will get back some of the owls I made and I will post a picture. Let me know how you get on.

  • Mermaid Necklet

    Mermaid Necklet

    Mermaid Necklet

    [singlepic id=106 w=320 h=240 mode=watermark float=]

    I have just entered my Mermaid Necklet in a Facebook competition for ‘Gifts from the Sea’. It is cloisonné enamel on fine silver. It is in a fine silver bezel with sterling silver fronds of seaweed which were cast from a wax model that I made. A single pearl hangs from a loop and it is suspended on a sterling silver chain. The cloisonné uses fine gold and fine silver wires. I have engraved a texture beneath the enamel and around the outside is written in wire the following words: ‘They dwelt in halls of seaweed and shells’. This is inspired by the words of an Enya song. The whole idea came to me when I was swimming off the coast of Crete. We were told that beneath us was the remains of a Roman city. As I swam, I wondered how they knew it was Roman and perhaps it was the Kingdom of the Merfolk.

    ‘Gifts from the Sea’ for me encompasses the myriad of colours and patterns found in fish; the sinuous, sensuous lines of fronds of sea weed; the intricate, exquisite detail of shells and the luscious bounty of the oyster. However, for me the greatest gift is to our imagination in the guise of Merfolk.  I believe that this necklet truly does represent ‘Gifts from the Sea’ in all it’s forms and I hope you like it.

  • Doggie Tags – Dog ID Tag

    Doggie Tags – Dog ID Tag

    Today we went for a family walk at Knole Park in Sevenoaks in Kent. It was raining as we left, but I am nothing if not an optimist. Sure enough as we drove, the rain stopped and the sun came out. As we parked the car we were treated to a beautiful rainbow above.  The National Trust allow dogs in the park so long as they are on a lead. Jyp isn’t reliable enough yet in any case not to be. He will come back so long as there aren’t any other distractions like people, dogs, cats etc. There are lots of deer at Knole, so any lead mishaps would doubtless result in an embarrassing ‘Fenton’ incident! Although he doesn’t go off the lead when he is out yet, I thought it would be a great idea if he had a name-tag with my mobile number on it. He is micro chipped but hopefully this will make it quicker to reunite us in the event of an escape. I decided to make him a bone shaped, enamelled one with his name in gold lustre on the front. I have engraved my phone number on the reverse. Here he completely exhausted after his walk, wearing his new tag. Perhaps I will make cat ID tags in the shape of a fish. They would make great Christmas Tree presents for pets. [singlepic id=101 w=320 h=240 mode=watermark float=][singlepic id=103 w=320 h=240 mode=watermark float=]

  • Guardian Angels On Folksy

    Guardian Angels On Folksy

    I have just listed my Guardian Angel Brooches and Pendants in my Folksy Shop. The idea for this range came to me during a visit to one of my favourite cities, York. I was there with my husband whilst my young son was away on a school trip aboad. Wandering around the cathedral, I could see angels at every turn. At the time I was reading a book by Rachael Hore called ‘The Glass Painter’s Daughter’ and a central part of the story concerns the restoration of an angel stained glass window. As I walked around this beautiful city, the idea came to me of developing a range of jewellery that would embody the love and thoughts of the giver, even whilst the wearer was far away. Regrettably my son would never wear one, but I hope that other children, spouses and parents will love and appreciate the concept. I think they make a perfect gift for a loved one who is going away. They are enamel on silver with cloisonne and fine gold detail.  They are 45 mm long and each one is hallmarked.